Levels
The most important part of the editor - the very reason the app was created in the first place - is the level editor. A level combines triles with placed assets and level-wide settings such as its sky, music, lighting, and liquid type.
With Eddy, you can edit:
- Level geometry built from triles and trile groups.
- Placed content, including art objects, background planes, and NPCs.
- Gameplay elements, including Gomez's starting position, volumes, paths, and scripts.
- Level settings, including the sky, music, ambience, lighting, rain, and liquid.
Levels are stored as .fezlvl.json files in the Levels/ folder.
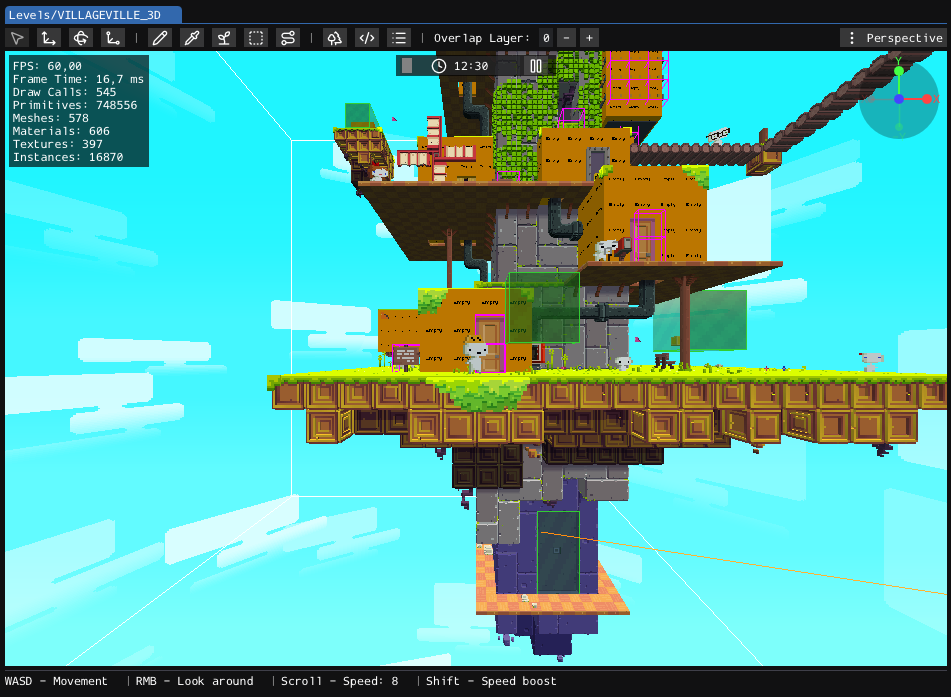
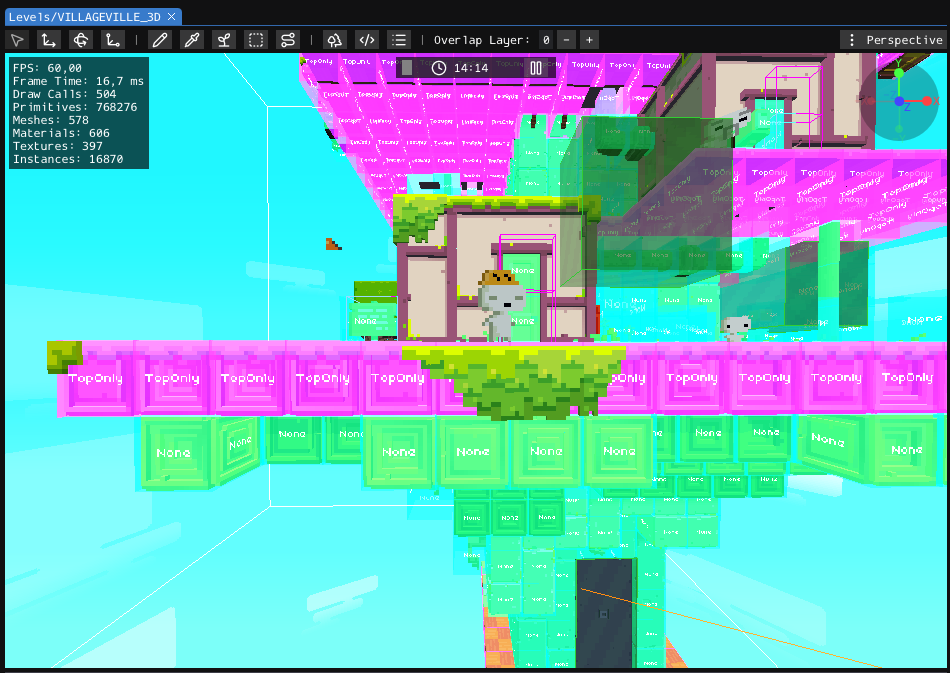
The level editor looks like this:
Creating a Level
When you create a new level, the editor will ask you to pick a trile set to use by the level.
Due to inability to map triles from one trileset to another, switching trile sets will not be possible through an editor once a level is created.
Newly created level will contain the following:
- A
16x16x16level area. - The
Defaultsky. - A floor made from the first non-empty trile in the selected trile set.
- Gomez's starting emplacement at
0, 0, 0, facing Front.
An emplacement is an integer position in the trile grid.
Layout
Toolbar
The toolbar has the following controls, from left to right:

- Select: Selects existing level elements.
- Translate: Moves the current selection.
- Rotate: Rotates the current selection.
- Scale: Resizes the current selection when supported.
- Paint: Places the selected asset or editing element.
- Pick: Selects the asset used by an existing instance, then switches to Paint.
- Asset Browser: Opens the list of assets available for placement.
- Place Volume: Starts placing a new volume.
- Start a New Path: Starts placing waypoints for a new path.
- Instance Browser: Opens the list of instances in the level.
- Script Browser: Opens the level's scripts.
- Properties: Opens the Properties window for the current selection.
- Overlap Layer: Selects the trile layer edited by Paint and Pick.
- View Options: Selects the camera projection and controls viewport visibility.
View Options
The View Options popup controls the camera projection and which elements are displayed.
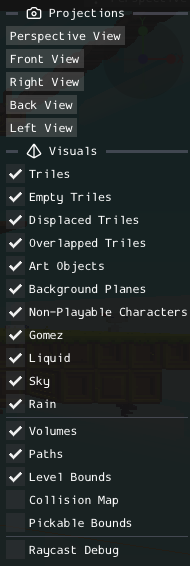
The instance toggles show or hide triles, art objects, background planes, NPCs, Gomez, liquid, the sky, and rain. Separate overlay toggles display volumes, paths, level bounds, the collision map, and pickable bounds.
Hidden elements cannot be selected in the viewport. Use the Instance Browser when you need to select an instance without displaying it.
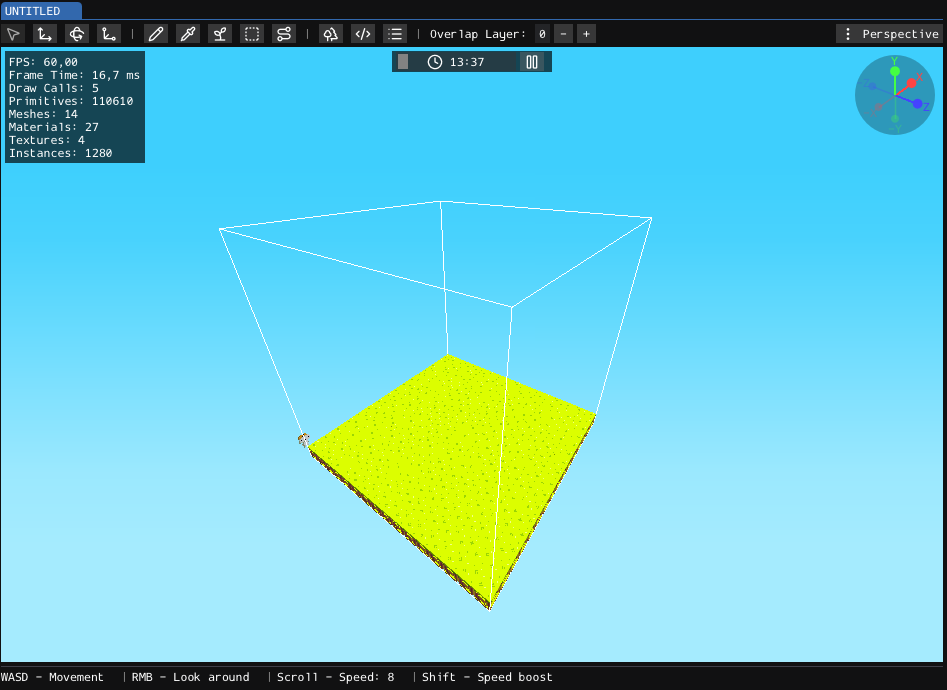
Viewport
The viewport displays the level and receives editing input.
Use Perspective View for general editing in 3D space. Use Front View, Right View, Back View, and Left View to inspect the level from FEZ's fixed camera directions.
The orientation gizmo in the top-right corner shows the current viewing direction.
Status Bar
The status bar at the bottom of the viewport shows the controls available for the active tool and selection.

Clock
The clock at the top of the viewport previews the level at different times of day.

Changing the time can affect lighting, ambience, and music phase behavior. This changes only the preview and does not set the time at which the level begins.
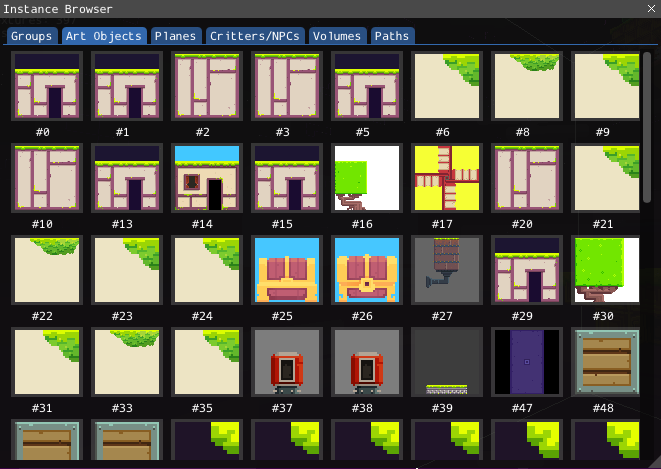
Asset Browser
This lists the triles, art objects, background planes, and NPCs available to the level.
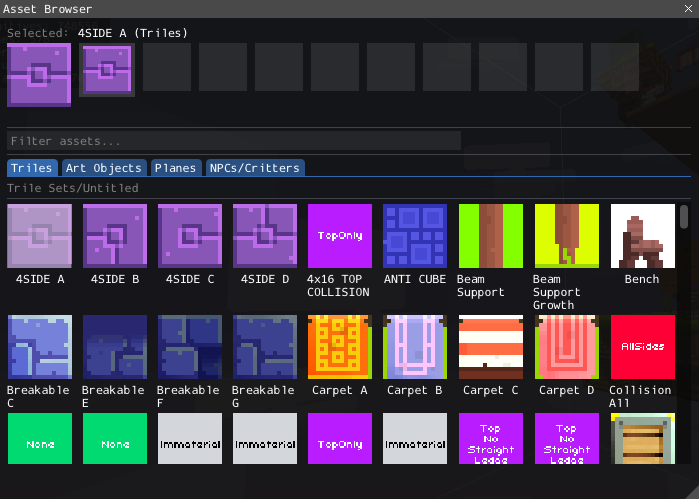
Selecting an asset switches Eddy to Paint and selects the matching editing context. Most assets are placed relative to the hovered trile surface.
Instance Browser
This lists the elements already placed in the level.
Use it to find and select instances that are difficult to reach in the viewport. It also displays the identifiers used to reference instances from scripts.
When the Script Browser requests an entity identifier, use the Instance Browser to select the corresponding level element.
Properties
This window displays settings for the current selection. When no instance is selected, it displays the level-wide properties.
Level properties control settings such as:
- Level name and size.
- Sky and song.
- Lighting and post-processing.
- Liquid type and height.
- Rain, ambience tracks, and muted loops.
- World-map node behavior and other level flags.
Select an instance to display its position, behavior, and type-specific settings instead. A multi-selection displays properties that can be edited for the entire selection.
Editing a Level
Most elements follow the same editing workflow:
- Select an asset or placement tool.
- Place it with Paint.
- Select it in the viewport or Instance Browser.
- Move, rotate, or scale it with the supported transform tools.
- Edit exact values and behavior in Properties.
The available operations depend on the selected element. Check the status bar after changing tools or selections.
You can press Delete to remove the selected elements or path waypoints. When painting triles, the status bar also shows the control used to erase from the active overlap layer.
Triles
Triles are grid-based blocks that form most level geometry and provide its main collision.
Select a trile in the Asset Browser, then use Paint to place it. Triles normally snap to integer emplacements, but they can be offset using either Position property or Translate tool when trile is selected.
By default, using Paint tool will paint triles in a place of currently hovered triles, essentially replacing them. This can be changed by holding one of modifier keys - holding Shift key will paint trile on top of currently hovered triles, while holding Control will delete currently hovered trile.
When trile is painted, its orientation is determined based on one of three rotation modes that can be switched with an R key:
- Front/Back/Left/Right (Scroll) - orientation is fixed, and controlled by scrolling a mouse wheel.
- Random - every placed trile has a randomized orientation.
- Copy - orientation is copied over from currently hovered trile.
If any faces are currently selected, Paint tool will act upon all of them according to currently held modifier keys. Every trile placed this way will have its rotation individually determined. This can allow easy orientation randomization of many triles at once.
Other tools can act upon selected triles as well. Scale tool allows to extrude triles along selected faces, while Rotate tool allows to manipulate orientation of selected triles.
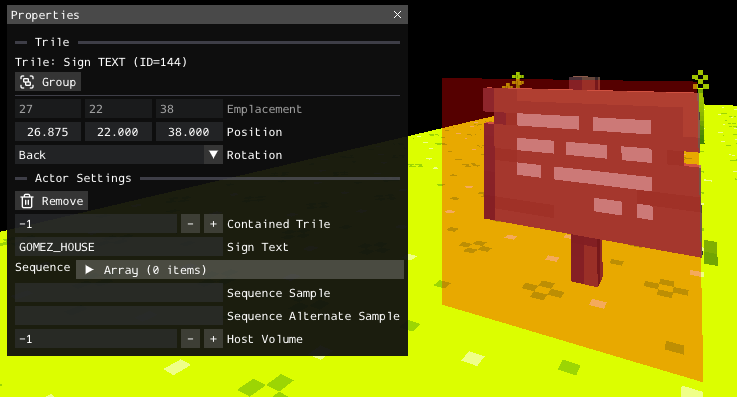
Properties
The Trile properties include its emplacement, position, rotation, contained trile, actor settings, and instance-specific data:
Overlap Layers
Overlap layers allow multiple triles to occupy the same emplacement.
Layer 0 edits the main trile. Layers above 0 edit additional triles stored at the same emplacement. The selected Overlap Layer applies globally while editing, although each emplacement can contain a different number of overlapped triles.
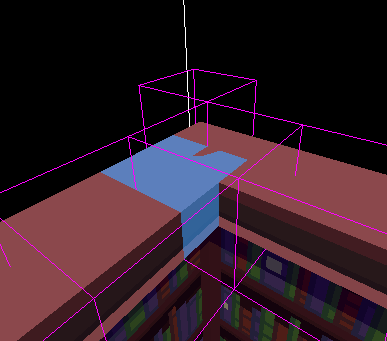
Use overlap layers for stacked visual details or gameplay triles that should not replace the main trile. Enable Overlapped Triles in View Options to display them.
Empty slots on an overlap layer do not affect the main trile on layer 0.
Trile Groups
A trile group makes multiple triles behave as one gameplay object.
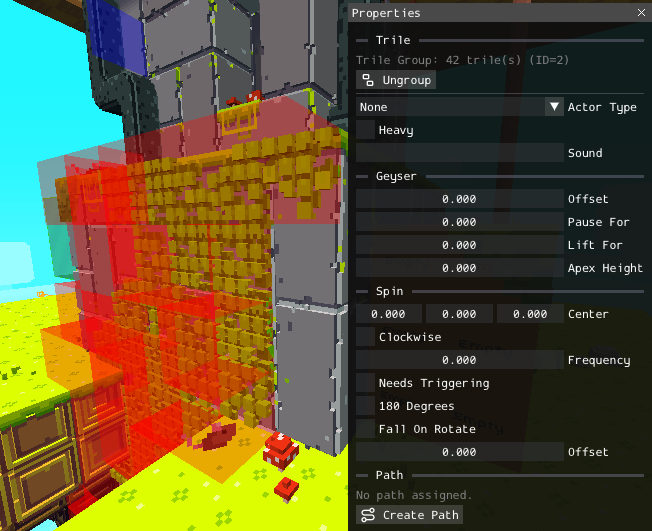
Select single or multiple triles, then use Group in the Trile properties to create a group. Selecting a grouped trile selects the entire group, and transform tools operate on its triles together. Scaling a group can add or remove triles from the grouped shape.
Group properties control behavior such as movement, spin, geysers, and path assignment. Use Ungroup to return its triles to normal independent instances.
Art Objects
Art objects are 3D models used for props, mechanisms, decorations, and large structures that are not built from triles.
Select an art object in the Asset Browser to place it. Its properties control the exact transform, actor type, and instance-specific settings:
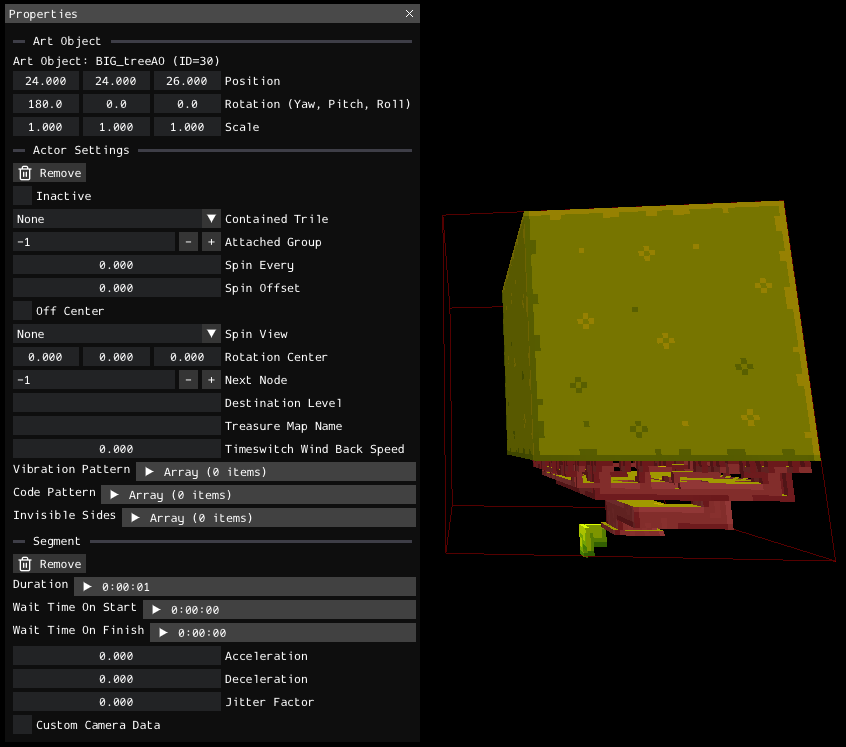
Art objects do not provide collision by themselves. Place triles around them when they need solid collision.
Background Planes
Background planes are flat textured planes used for decals, overlays, animated textures, parallax details, and other visual effects.
Their properties control the transform, opacity, animation, billboarding, texture repetition, lighting behavior, and related flags:
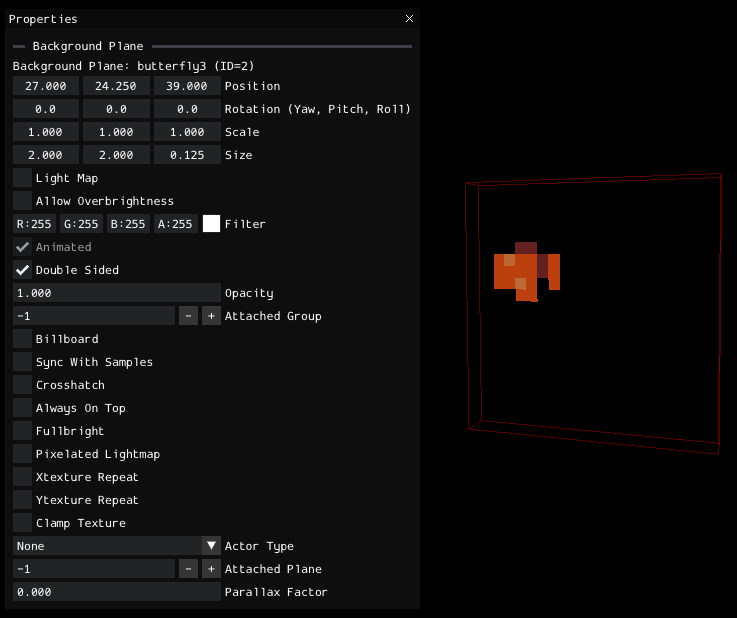
Select a background plane in the Asset Browser to place it. Use the Instance Browser when a plane is difficult to select in the viewport.
NPCs
NPCs are character instances placed in a level.
Select an NPC in the Asset Browser to place it. NPC properties control its placement, dialogue, actions, and instance-specific behavior:
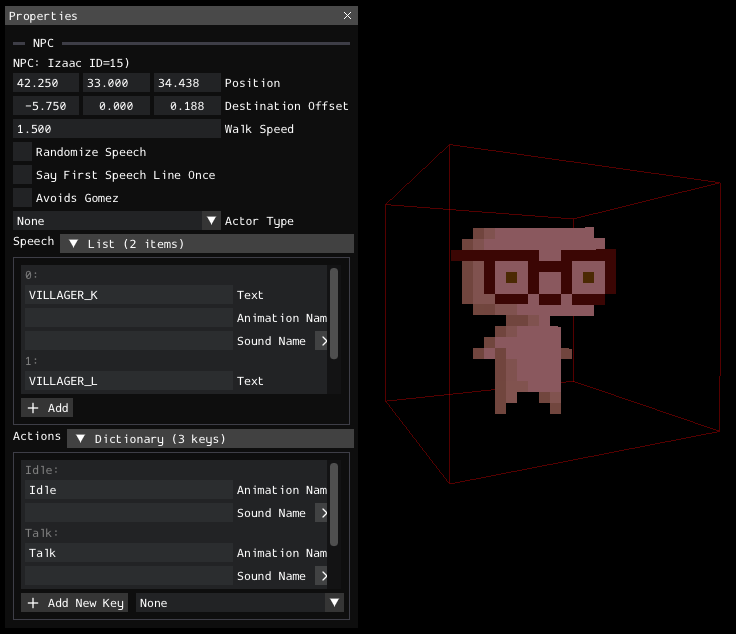
Properties shared by every instance of an NPC are stored separately. See NPC Metadata for details.
Gomez
Gomez represents the player's starting position and facing direction.
Select Gomez in the viewport or Instance Browser. Use Translate to move the starting emplacement and Rotate to change the starting face. Both values can also be edited directly in Properties:
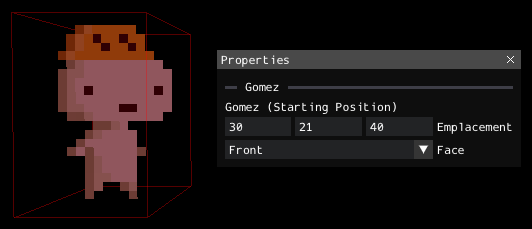
The camera initially focuses near Gomez when a level is opened in Eddy.
Volumes
Volumes are invisible cuboid regions used by doors, triggers, camera focus, black holes, and other level logic.
Use Place Volume, then click a trile surface to create a 1x1x1 volume beside it. Select the volume to move or scale it.
Volume properties control its bounds, orientations, actor settings, and instance-specific data:
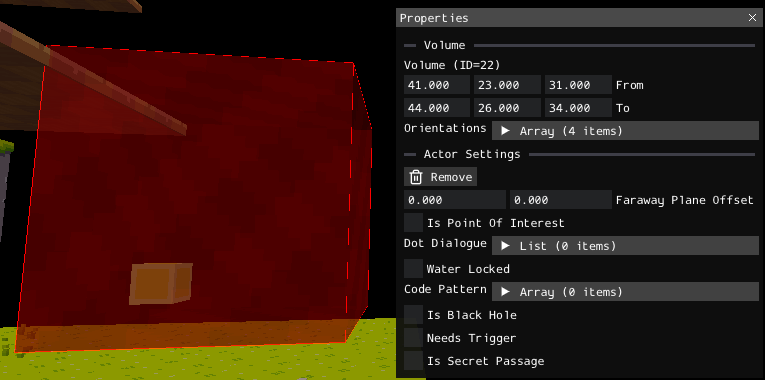
Enable Volumes in View Options to display and select them in the viewport.
Paths
Paths are waypoint lists used for moving trile groups, camera movement, and other path-driven behavior.
Use Start a New Path, then click a trile surface to place its first waypoint. Add further waypoints with Add Segment in the Path properties, then move them in the viewport or edit their destinations directly.
Path properties control its end behavior, timing, sound, and individual segment data:
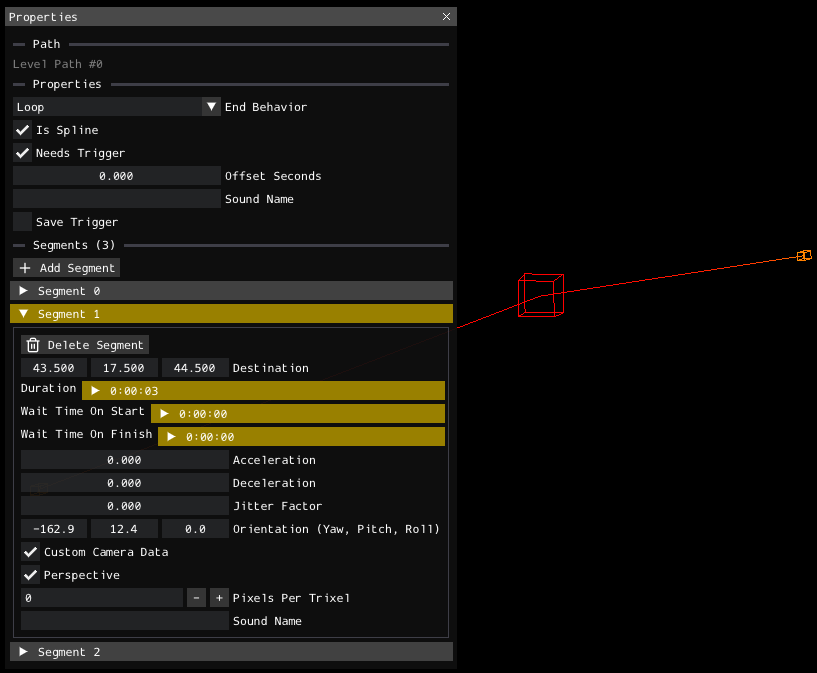
Paths can be referenced by scripts or assigned to other elements, such as trile groups.
Scripts
Scripts connect triggers, conditions, and actions to control level events.
Open the Script Browser to create, edit, clone, or delete scripts stored in the current level:
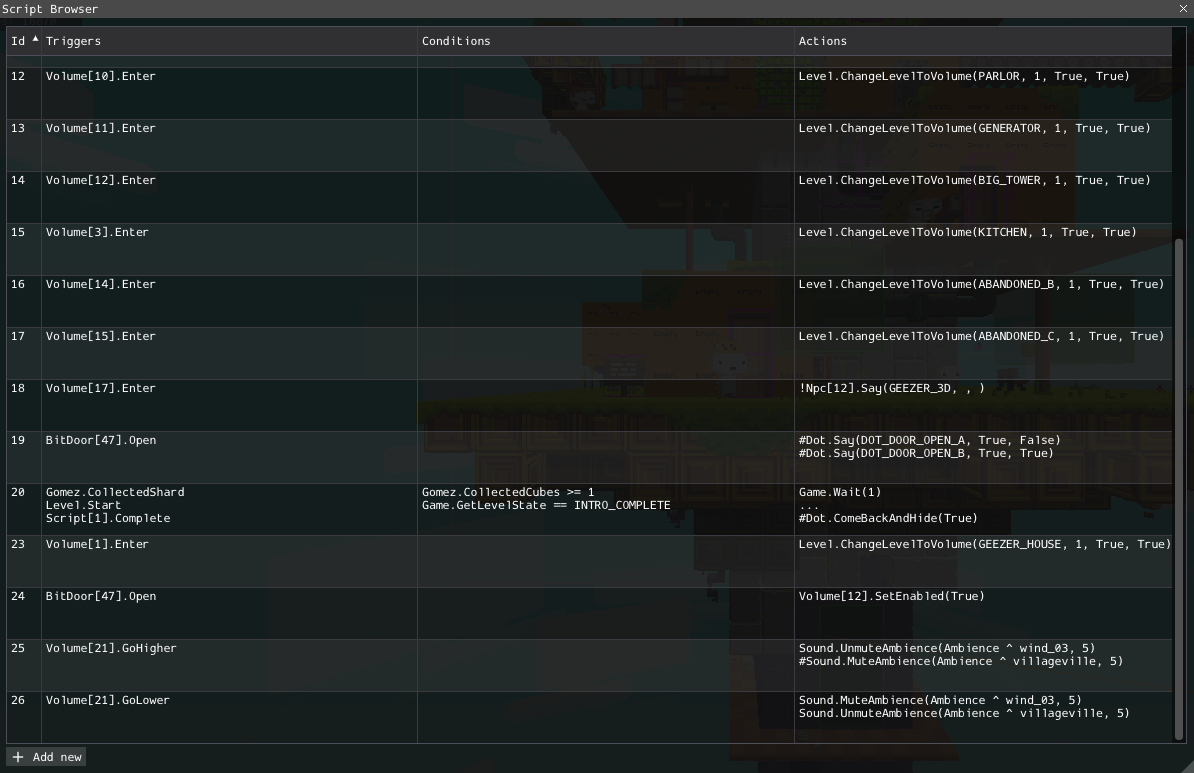
The script editor can use the Instance Browser to select the identifiers of volumes, art objects, trile groups, and other entities:
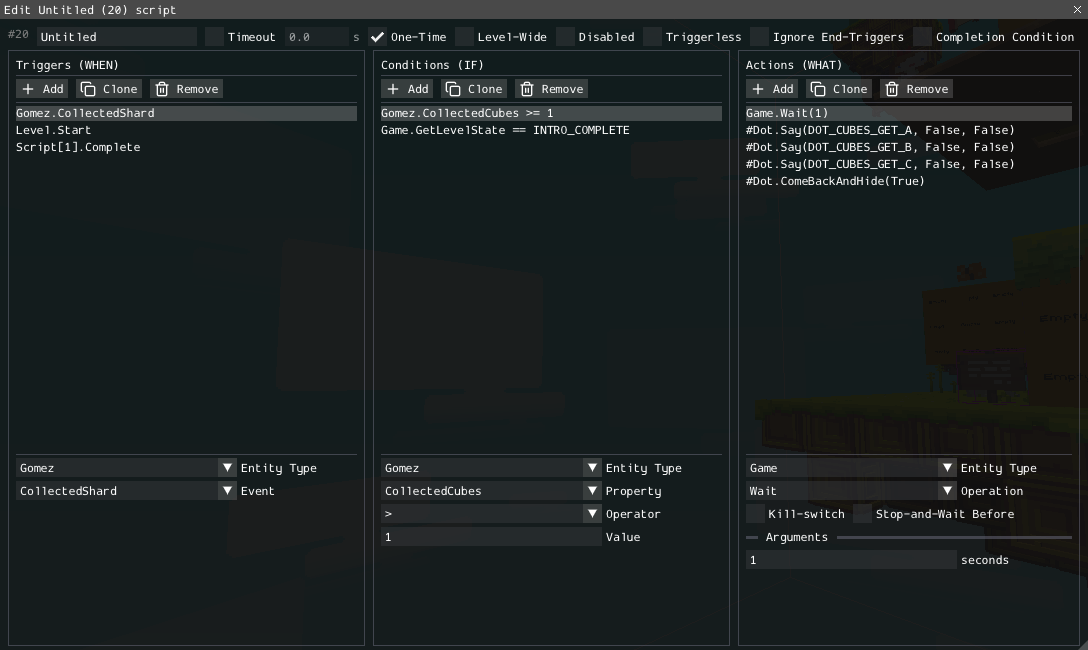
See Scripting a Level for the complete scripting workflow.
Inspection and Preview
Collision Map
You can enable Collision Map in View Options to display the collision generated by the level's triles.
Use it to find missing collision, unintended walls, and incorrect one-way surfaces. Collision types are defined by the triles in the selected trile set.
Testing a level
Due to the auto-save system, your currently selected save file will store your level state data and may cause a crash if attempted to load in unmodded game or level has been moved/deleted. To avoid this, create an empty save file or back up an existing one!
In order to quickly test the level, it is recommended to use the FEZUG mod with HAT modloader installed and follow these steps:
- Create new asset mod using this guide.
- Create
Leveldirectory within your mod'sAssetsdirectory and copy your.fezlvl.jsonlevel file into that folder. - Start the HAT-patched game.
- Hit the
~key to bring a console and typewarp <YOUR_LEVEL_NAME>command. - Enjoy and test the level.
You can use **Open mod assets directory** option in the welcome screen to open the `Assets` directory of your mod to avoid copying over the files.
When planning to create a mod with a custom level, it is recommended to create a custom world mod (introduced in HAT v2.1.0) and test levels by creating a new save file in created world. You can learn more about it in this guide.
HAT also supports level hot-reload. One the game detects any changes in the level file, it will be automatically reloaded.
The game will not automatically display your level on the world map. To update it, refer to the World Map page.
Reference
A detailed description of the level properties is available in the FEZLVL format reference.
For related workflows, see Triles and Art Objects, Scripting a Level, and NPC Metadata.